Building a GitHub Profile
A step-by-step guide to customizing your GitHub profile.

Introduction
It's important to maintain a decent GitHub profile. Your opinions about Microsoft and the recent GitHub security scandal aside, GitHub remains the most popular platform for hosting and sharing code. Whether you're a student looking for internships, a developer building side projects, or just someone who likes tinkering with technology, chances are your GitHub profile is one of the first things people will look at when trying to learn more about you.
Of course, your skills and projects matter far more than how your profile looks. A polished GitHub profile won't compensate for weak projects, but creating a good first impression is rarely a waste of effort.
The first thing you should do is figure out what you want from your profile. I'm not here to tell you what a "good" GitHub profile looks like, because there isn't a single correct answer. Different developers have different goals and tastes.
Some people prefer a highly visual profile with animations, illustrations, and colorful widgets. Others prefer something cleaner and more functional. Since I spend most of my time working on backend and infrastructure-related projects, I went with a console-inspired theme that felt more natural to me.
Before adding badges, statistics, or fancy effects, spend a few minutes exploring profiles you like and deciding what kind of impression you want yours to leave.
The Special Repository
Let's start with the absolute basics: GitHub's special repository.
Normally, repositories on GitHub are used to store code, documentation, or other project files. However, GitHub has a special feature where a repository with the same name as your username becomes your profile repository.
For example, my username is Shreyash0712, so creating a repository named Shreyash0712 gives me access to a special README.md file that is displayed directly on my profile page.
Creating it is simple. Click the New Repository button, enter your GitHub username as the repository name, and make sure to initialize it with a README file. GitHub will even show a message indicating that you're creating a special profile repository.
Once the repository is created, everything you add to the README.md file will be displayed directly on your profile page. Think of it as the homepage of your GitHub account, a place where you can introduce yourself, showcase your work, and point visitors toward your most important projects.
You can try writing "Hello world" and see how it's visible in your profile.
Scripts and Workflows
If all you want is a static profile, you're pretty much done. Create the profile repository, write a nice README, add a few images or badges, and call it a day.
Most profile customizations you see online work exactly like this. They use widgets, badges, or services created by other developers and simply embed them into the README.
Things get more interesting when you want your profile to update automatically.
Maybe you want to display your exact age, without having to manually change your README everyday. Maybe you want a counter showing profile visitors. Maybe you want to fetch your latest blog posts, update a quote every day, or show the current date and time. Since a README file is just a static file, it won't magically update itself. Something needs to generate the new content and push the changes back to GitHub.
This is where GitHub Actions come in.
GitHub Actions is GitHub's automation platform. It allows you to run scripts and programs directly on GitHub's servers whenever certain events occur. For example, a workflow can run whenever you push code, create a pull request, or on a schedule.
The scheduled variant is particularly useful for profile repositories. Using a cron expression, you can tell GitHub to execute a workflow every hour, every day, or at almost any interval you need. When the workflow runs, it can execute a Python script, Node.js application, shell script, or practically any other program capable of generating content.
GitHub Token / Personal Access Token (PAT)
A common setup looks something like this:
A scheduled workflow starts running.
It executes a script.
The script generates updated content for the README.
The workflow commits the changes.
GitHub updates the profile automatically.
When I first started experimenting with dynamic profile elements, understanding this workflow was probably the most important step. Once you realize that your profile can be modified by code, the possibilities become much larger than simple text and images.
Of course, GitHub doesn't allow random programs to modify repositories. The workflow needs permission to write changes back to the repository.
For this, GitHub provides a built-in token called GITHUB_TOKEN. Every workflow run automatically receives one, and in many cases that's all you need. The token allows the workflow to authenticate itself and perform actions such as creating commits, pushing changes, or interacting with other GitHub features.
You will also see many tutorials mentioning Personal Access Tokens (PATs). A PAT is essentially a scoped access key generated from your GitHub account. Unlike your password, it can be restricted to specific repositories and permissions. This makes it safer and more flexible for automation tasks.
If a workflow requires a PAT, never place it directly in your code or commit it to a repository. Instead, store it as a Repository Secret. Secrets are encrypted values that GitHub makes available to workflows during execution while keeping them hidden from public view.
Once you understand workflows, scheduled jobs, and authentication, most dynamic GitHub profile projects stop looking like magic. Whether you're updating your age every day, displaying your latest blog posts, or generating custom statistics, they're all following the same basic idea: run a script, generate content, and let GitHub Actions update the README automatically.
Make Your Design
With all of that out of the way, you now have all the building blocks you need to create a dynamic GitHub profile: a profile repository, scripts, workflows, and authentication.
If you're still unsure about any of these concepts, don't worry too much. There are plenty of resources online, and modern AI tools are surprisingly good at explaining GitHub Actions, cron expressions, and automation workflows. My goal here isn't to turn this article into a complete GitHub Actions tutorial. I simply want to point you in the right direction and explain the pieces involved.
The fun part starts now: designing your profile.
Think about what you want visitors to see. Maybe you want a clean introduction and a list of projects. Maybe you want your latest blog posts, current age, coding statistics, visitor counters, or even something completely custom. The profile is yours, so don't be afraid to experiment.
Once you have an idea, the implementation is usually straightforward. Write a script in Python, JavaScript, Go, or whatever language you prefer. Have that script generate the content you want and update your README.md. Then configure a GitHub Actions workflow to run the script on a schedule.
That's really all a dynamic profile is: a script that updates a README and a workflow that keeps running that script automatically.
Everything else is just creativity.
Steal My Setup
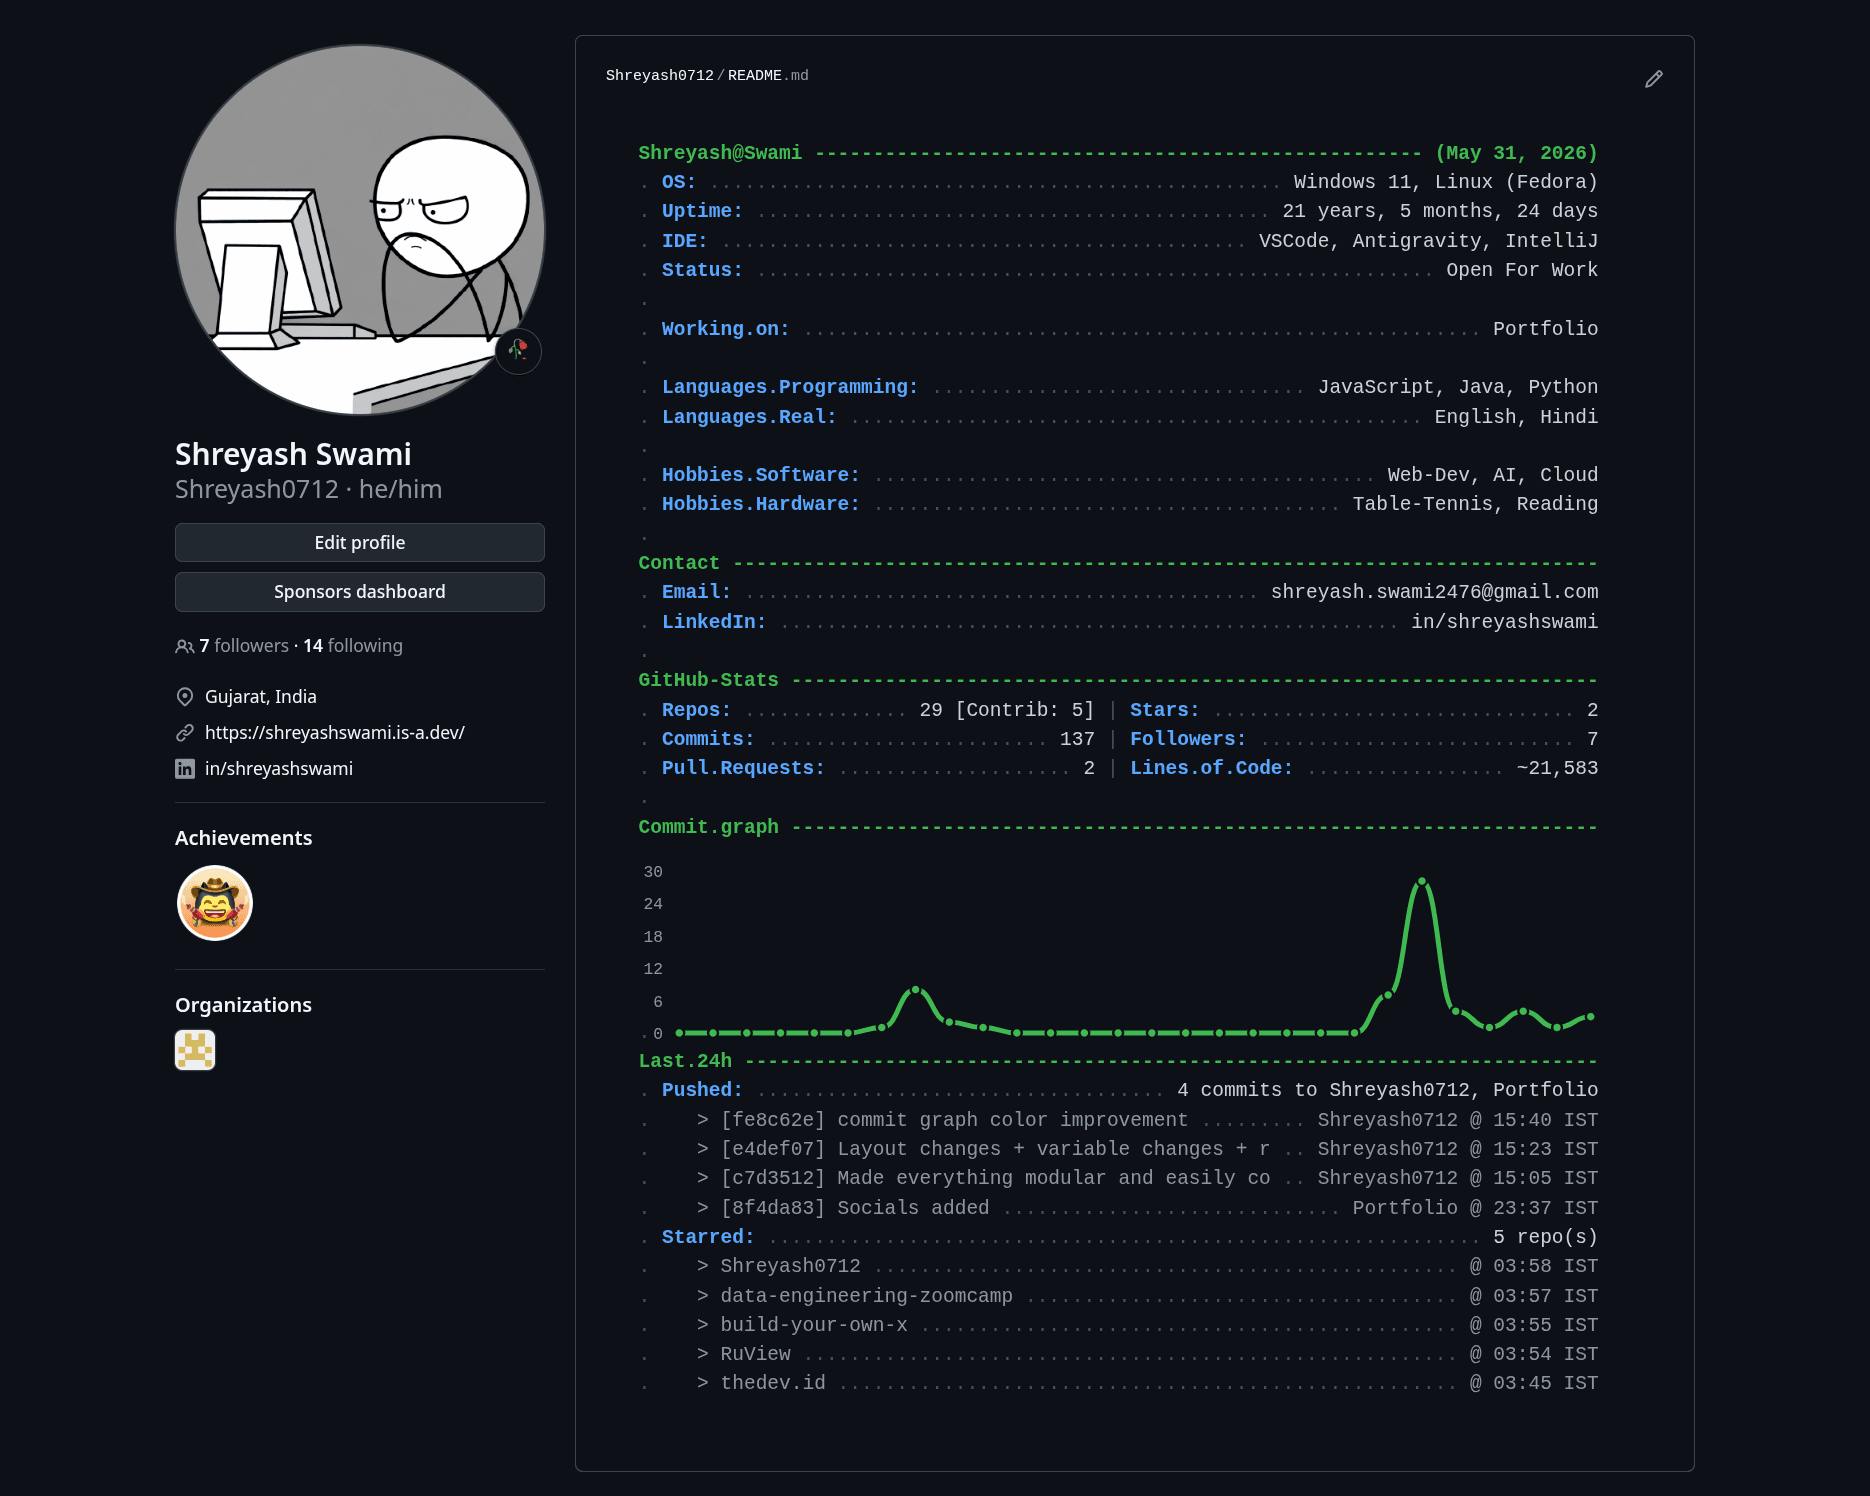
While building my profile, I discovered a neat GitHub feature that I hadn't seen many people talk about. GitHub can detect whether a visitor is using a light or dark theme and display different resources accordingly.
It's a small detail, but it can make a surprisingly big difference to the overall experience.
In my case, I generate two versions of the same content: one optimized for light mode and one for dark mode. I chose to render them as images rather than plain text because some of the formatting became difficult to read on smaller screens. By generating images, I could ensure that the layout looked consistent across devices.
The switching itself is handled using standard HTML:
<source media="(prefers-color-scheme: dark)" srcset="github-metrics-dark.svg">
<source media="(prefers-color-scheme: light)" srcset="github-metrics-light.svg">
GitHub automatically selects the appropriate resource based on the visitor's theme preference.
As I continued working on the profile, I took things a step further and made the entire setup configurable. Most of the customization lives in a configuration file, which means other people can clone the repository, change a few values, and generate a profile of their own without rewriting everything from scratch.
If you'd like to try the setup yourself, feel free to explore the repository:
github.com/Shreyash0712/Shreyash0712
In particular, take a look at the user_config.py file. Most of the customization happens there. You can clone the repository, modify the configuration to your liking, and push it to your own profile repository.
One important thing to note is that the setup expects a GitHub token to be available. Before running the workflows, you'll need to generate a Personal Access Token (PAT) and store it as a repository secret named METRICS_TOKEN.
The workflows and scripts use this token to access GitHub APIs and generate various profile statistics. Without it, the automation will fail and the profile won't be generated correctly.
Once the token is configured, you can customize the configuration file, push the changes, and let GitHub Actions handle the rest. The workflow will regenerate the profile every 8 hours and keep everything up to date automatically.
Closing Thoughts
And that's about it for this blog.
The topic itself is fairly simple, but after spending a few days building and refining my own GitHub profile, I thought it would be fun to share what I learned along the way. Hopefully it gives you a starting point for creating a profile of your own, whether you want something minimal and professional or completely over-engineered.
More than anything, I hope this encourages you to experiment. Some of the most interesting things I've built started with a simple "I wonder if this is possible."
I'll be back with another project, experience, or random technical rabbit hole soon. Until then, happy coding, and happy profile building.
Comments (0)
No comments yet. Be the first to share your thoughts!